

🖥️ First Steps With NoesisGUI Standalone
🏘️ NoesisGUI ▸ 🏠 Noesis Studio ▸ 🖥️ First Steps With NoesisGUI Standalone
Opening Noesis Studio and Discovering the Launcher
Once Noesis Studio has been downloaded (📥 Downloads), open the Noesis Studio application. The Launcher will open, and you will be presented with a selection of options; including:
- 📑 Installing Sample Projects
- 📑 Opening Projects
- 📑 Creating Projects
- 📑 Adding Projects
- 📑 Removing Projects
- 📑 Miscellaneous Actions
Installing Sample Projects
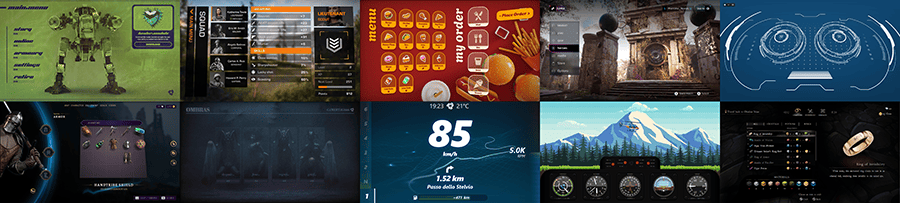
When the launcher is first opened, you will be given the opportunity to install all of the Samples included with the application, in a location of your choosing.
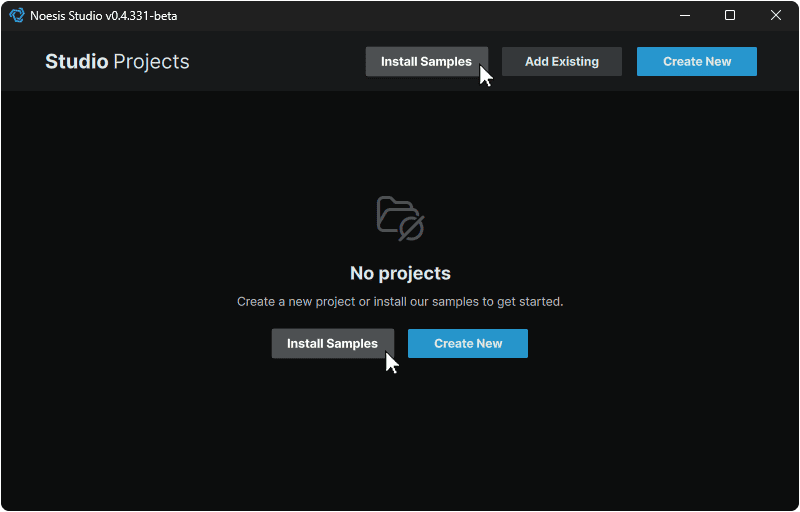
This can be achieved by first clicking on any of 'Install Samples' buttons found within the Launcher.
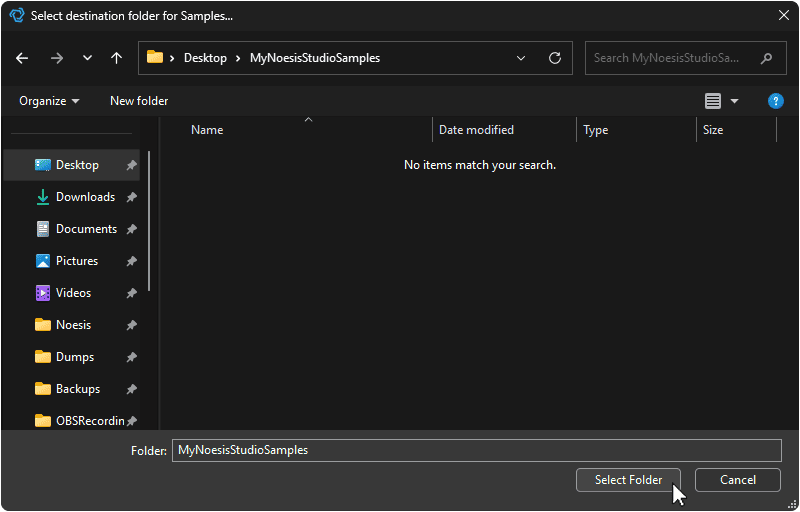
Once pressed, in the operating system's file explorer, selecting which directory to save them in, and pressing 'Select Folder'.
After a short moment, they will then appear within the launcher's Project listing, from where they can be accessed.
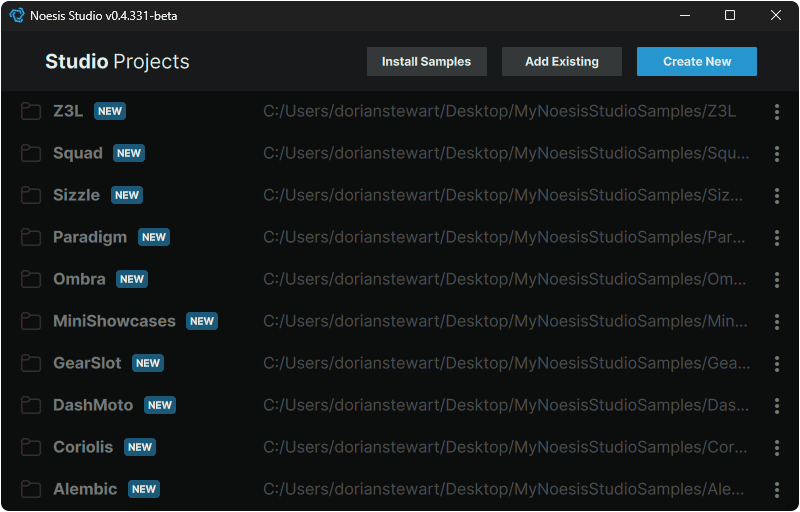
The Sample Projects serve as a useful learning tool, as they can be freely inspected to learn how a wide array of common interfaces and UI elements can be leveraged in a myriad of ways.
Opening Projects
Any projects present in the Project Listing can be launched in the Launcher by clicking on the project row. This will then proceed to open the Project in the Noesis Studio visual editor.
Creating Projects
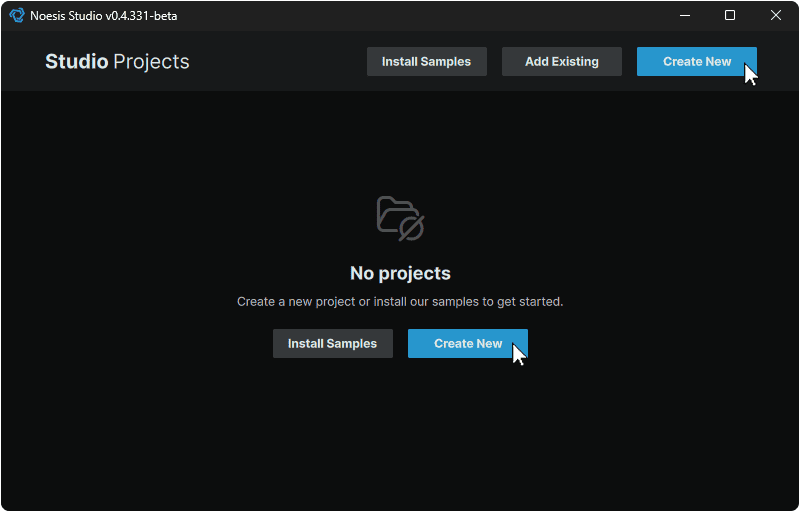
Clicking 'Create New' in the Launcher will open your file browser, from where you can select a directory in which to store your .noesis project file.
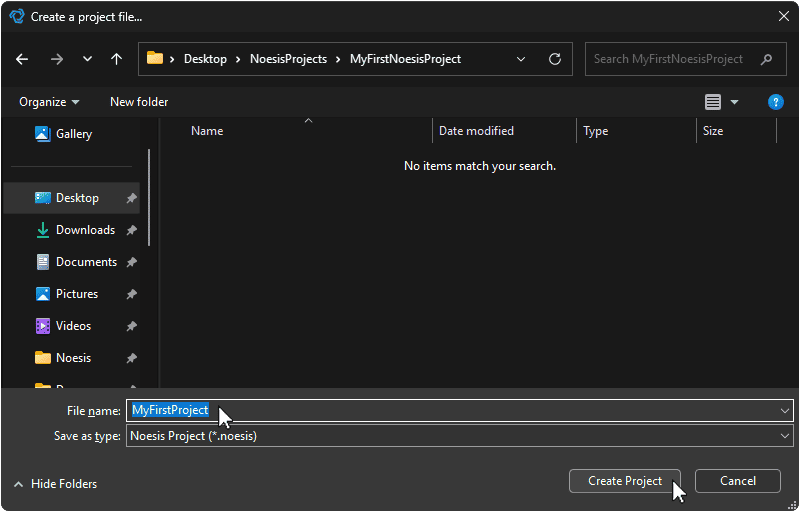
Once created, this new .noesis file, or project root can be moved to a different location on your machine after creating it, but doing so will make it disappear from the project listing. To make it appear once again will require you to select 'Add Existing' within the Launcher, and re-add it from its new location: 📑 Adding Projects
Note
When inputting the name for your new .noesis file, you are not obligated to include the '.noesis' extension in the field. If this suffix is not included in the file name directly, it will be automatically added after providing a name and clicking 'Add Project' to complete the creation of your project file.
Note
To avoid breaking any content, once you have created interfaces within Studio, it is not recommended to move your .noesis file to a different location without its associated .xaml files that it depends on to correctly display, and to function.
Adding Projects
Clicking the 'Add Existing' button will open your file browser, and allow you to select an existing .noesis project to add to the Launcher.

Note
If you already have a non-Studio XAML project that you wish to open in Studio, you will first have to create a new .noesis project in the same directory as your current project's root. This can be done directly from the launcher: 📑 Creating Projects
Removing Projects
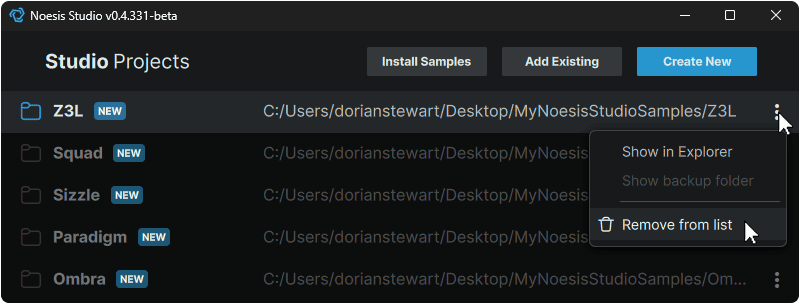
Clicking on a Project's ⋮ (3-Dot) menu icon, then selecting 🗑 (Remove from list) icon found in the menu remove it from the project listing until it is manually re-added.
Note
Removing a project from the Launcher, only removes it from the project listing, and does not remove it from your machine.
Miscellaneous Actions
Every Project also includes a selection of other actions that can be accessed from a Project's ⋮ (3-Dot) menu icon.
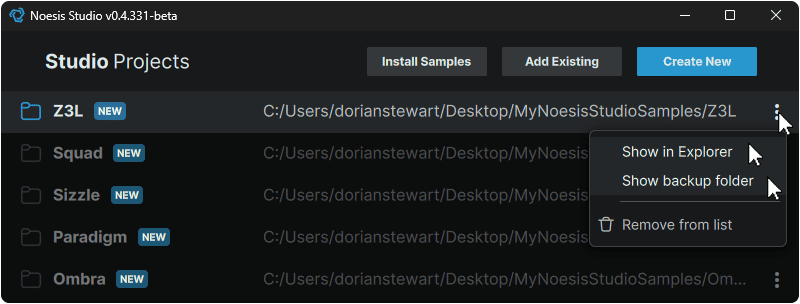
| Show in Explorer | Opens an operating system file browser window at the Project's location. |
| Show Backup Folder | Noesis Studio comes with a robust auto-save system that, in the event of a program error, will allow you to re-open the Project without any loss of work, in the event that the Project was not saved prior. Showing the Backup folder provides direct access to these files in their folder. |
Creating Your First User Interface in Noesis Studio
When you are set up, ready to jump in and continue your journey with Studio, moving into the visual editor, we recommend following with any of our guided 🎓 Tutorials which will teach you many of the fundamentals of UI creation in the visual editor.