📘 Path Management
🏘️ NoesisGUI ▸ 🏠 Noesis Studio ▸ 📘 Working With Paths ▸ 📘 Path Management
Overview
Although vector files do not appear in, and cannot be managed from the 📘 Assets Panel, collections of Paths, as well as their visual styling, can be stored and managed from a centralized location. This is an ideal approach for Paths that are used in multiple places, such as a recurring symbol used across several icons or interface elements.

Note
Only a single Path can be stored in a Path Resource, and it is therefore not the recommended method for storing and managing multi-Path/multi-layered iconography. In circumstances where a library of icons composed of various Paths is desired, using the methods described in 🎓 Creating an Icon Library in Noesis Studio should be followed.
Storing, and Using Stored Vector Paths
The geometry that makes up any Path can be stored as a Resource which can be easily re-used, and applied to any other Path to take its place.
Storing Path Data
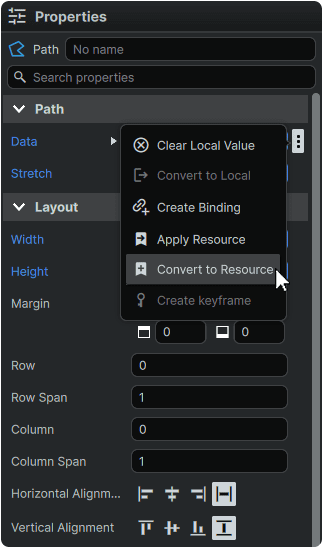
A Path's geometry can be saved as a Resource by selecting any Path, navigating to the 📘 Properties Panel, hovering over the 'Path' category's 'Data' field, and from the ⋮ (3-Dot menu), selecting 'Convert to Resource'.
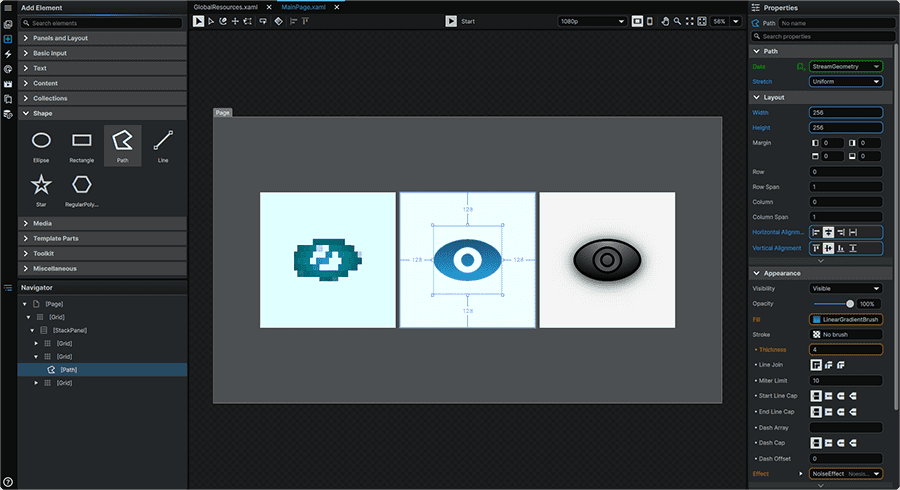
This will save The Path's geometry as a Resource within GlobalResources as a 'StreamGeometry' object which can be found within the 📘 Resources Panel.
Editing Path Data
This operation is currently not possible without editing the Resource's XAML in VSCode.
Follow the resolution of this issue: 🦗 Ticket #3489
Changing the Storage Location of Path Data
A Path Data Resource can be moved to another ResourceDictionary by navigating to the 📘 Resources Panel, finding the StreamGeometry Resource and dragging it to a different ResourceDictionary.
Using Path Data
With at least one Path stored as a Resource, saved geometry can be applied to any other Path.
To achieve this, the target Path can be selected either from the 📘 Stage or from the 📘 Navigator Panel to expose its properties in the 📘 Properties Panel.
The Path's 'Data' field can then be hovered over to reveal its ⋮ (3-Dot) menu, from which 'Apply Resource' can be selected, followed by selecting the vector graphic to apply from the 'Resource Key' dropdown.
This will then update the Path with the desired graphic.
Path Styles
Whilst the Path Data Resource comprises the geometry of a particular vector element, Styles can be used to manage the presentation of vector graphics across the range of available Path Properties.
Creating a Path Style From an Existing Path's Properties
A Path Style can be generated from an existing Path which already contains a set of visual properties, and which, once saved, can be easily applied to any other Path.
A Path containing customized Properties can have all of its attributes saved as a reusable Resource by right-clicking on the Path from either the 📘 Stage or within the 📘 Navigator Panel, navigating to the 'Make Into' category, and selecting 'Style'.
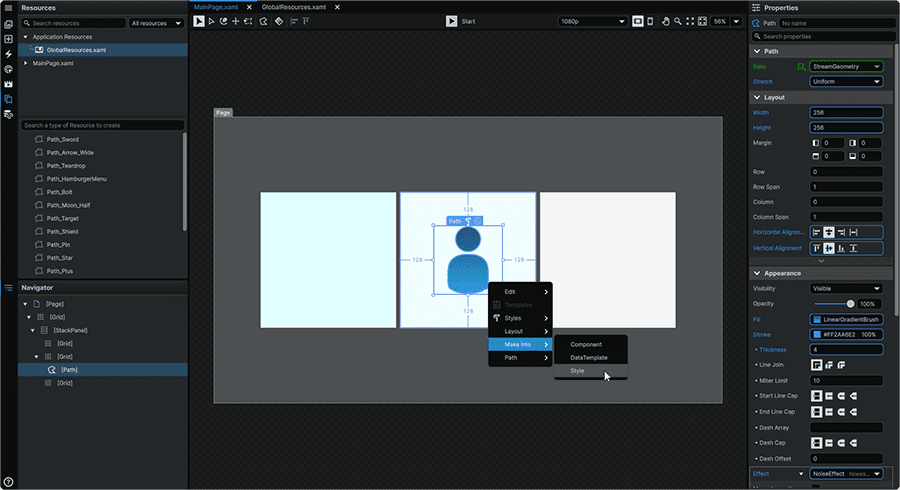
Completing this action will result in:
- The Style being saved as a Resource, accessible through the 📘 Resources Panel.
- The Style being applied to the Path Element from which the operation was performed.
- Opening the Style in the Style Editor, from where it can be edited further, or closed to return to the Page.
Note
By default, creating a Style from an existing Path in this method will also include the original Path's geometry as part of the Style. This can be undesirable if the goal is to create a Style which can be applied to different Paths, each with their own geometries.
Path Data can be removed from the Style by opening the Style for edit from the 📘 Resources Panel by hovering over the Resource in the list and clicking the 🖉 (Edit) icon. This will open the Resource in the Style Editor. Then, with the Style open the 'Data' field can be hovered in the 📘 Properties Panel to reveal its ⋮ (3-Dot) menu from which 'Clear Local Value' can be selected. This will result in being able to apply all Style Properties to another Path without modifying the geometry of the shape itself.
Creating a Blank Style From a Path Element
A blank Path Style can be created directly from any Path present on a Page, without needing to first first commit to a visual style.
A blank Style can be created by right-clicking on any Path either from the 📘 Stage or within the 📘 Navigator Panel, then from within the 'Styles' section of its context menu, selecting 'Path', then 'Create'.

Completing this action will result in:
- The blank Style being saved as a Resource, accessible through the 📘 Resources Panel.
- The blank Style being applied to the Path Element from which the operation was performed.
- Opening the blank Style in the Style Editor, from where it can be edited further, or closed to return to the Page.
Creating a Blank Path Style From The Resources Panel
A blank Path Style can also be created from the 📘 Resources Panel, without needing to first have a Path present on a Page.
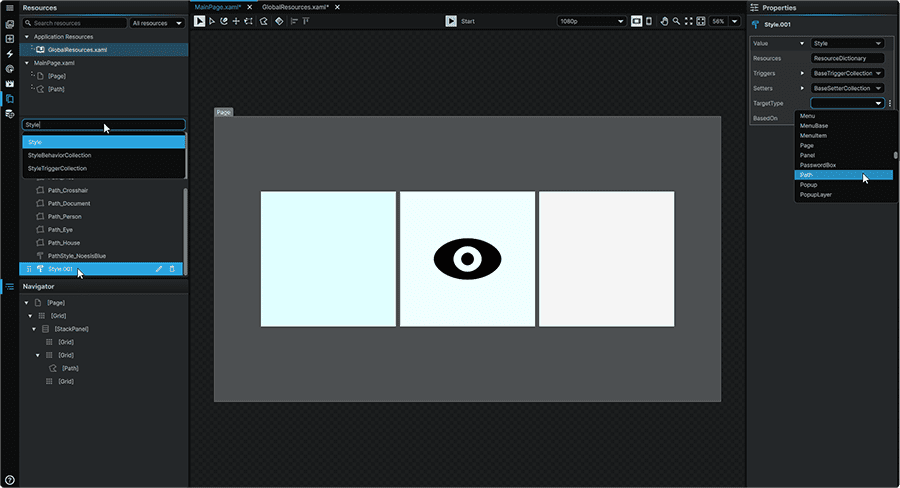
A blank Style can be created from the 📘 Resources Panel by selecting the target Dictionary to store the blank Style into from the Resource Scope Browser and selecting 'Style' from the Resource Browser field titled 'Search a type of Resource to create'.
Then, the new Resource can be selected from the Resource Browser, and in the 📘 Properties Panel, its 'Target Type' can then be set to 'Path' to complete the operation.
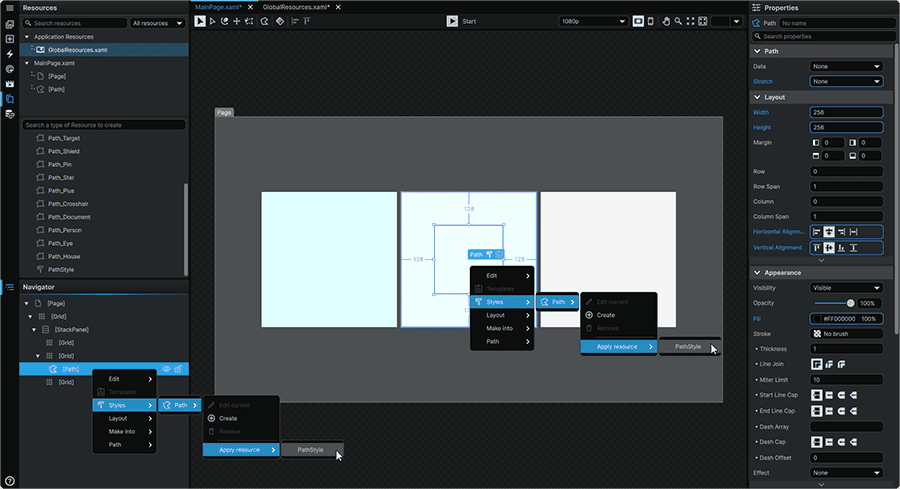
The Path Style can now be edited through the 📘 Resources Panel, or applied to any applicable Paths by right-clicking on a Path, navigating to the context menu's 'Styles' category, navigating over 'Path', then under 'Apply Resource', selecting the desired Style to apply.
Editing a Path Style
Editing the Properties existing Style can be performed by finding it in the 📘 Resources Panel, hovering over it, and clicking the 🖉 (Edit) icon.
Alternately, opening a Style for edit can be also be performed by right-clicking on any Path that has the desired Style already applied to it, opening the context menu's 'Styles' category, navigating to 'Path', then selecting 'Edit Current'.
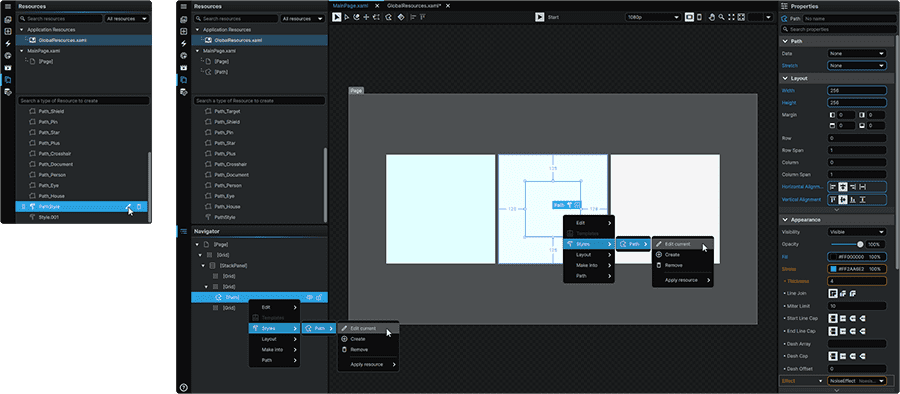
Both of these methods will open the Style in isolation within the Style Editor, from where changes can be made. Any changes made within the Style will update wherever the Style is employed.
Applying Path Styles
To apply a created Path Style to any Path, right-click on it on either from the Stage, or within the Navigator to open its context menu. Then, from the 'Styles' section, select 'Apply Resource', and select the desired Path Style to apply.
Changing the Storage Location of a Path Style
The Path Style Resource can be accessed via the 📘 Resources Panel. The Path Style can be moved to a different Dictionary by finding it in the Resources, and dragging it to a different ResourceDictionary.
Working With Paths
- 📘 Path Introduction
- 📘 Path Import Features
- 📘 Path Creation and Manipulation
- 📘 Path Management
- 📘 Path Properties
- 📘 Path Animation
Table of Contents